Continuous benchmarking on supercomputers
The paper “Towards Continuous Benchmarking: An Automated Performance Evaluation Framework for High Performance Software”, by Anzt, H. et al. describes the posibilities of continuous benchmarking (CB), however it doesn’t give direct instructions how to implement it. Looking at the source code is always a possibility, but the yaml files there aren’t really documented (which is no surprises since they are pretty self documenting). Still, I hope this post will help people who unfamiliar with Continuous X approaches (where X can be integration, development, benchmarking etc).
Overview
We will need 3 things:
- The app/benchmark itself, which we will assume to be given.
- We need to set up a “self-hosted runner”, the program running on the supercomputer, which will be executing the actions such as compiling the app and submitting job to the scheduler of the supercomputer.
- The yaml file which describes when and what should be executed by the “runner”.
I’ll be describing the scenario for GitHub. Other sites like GitLab have similar systems.
Self-hosted runner
In the Github repo settings, on the left-hand side, under Actions there is a Runners page. In the top-right corner there is a green New self-hosted runner button. Clicking on this button brings up a page where you can select the OS and architecture. For supercomputers Linux, x64 is a good choice since usually that is something that will run on the login node.
Below the OS and architecture choice, the page lists the commands needed to install the self-hosted runner. This consists of several sections.
The first section described how to download, validate and extract the runner software. Don’t use these instructions, use the ones from the GitHub settings page.
# Create a folder
$ mkdir actions-runner && cd actions-runner
# Download the latest runner package
$ curl -o actions-runner-linux-x64-2.291.1.tar.gz -L https://github.com/actions/runner/releases/download/v2.291.1/actions-runner-linux-x64-2.291.1.tar.gz
# Optional: Validate the hash
$ echo "1bde3f2baf514adda5f8cf2ce531edd2f6be52ed84b9b6733bf43006d36dcd4c  actions-runner-linux-x64-2.291.1.tar.gz" | shasum -a 256 -c
# Extract the installer
$ tar xzf ./actions-runner-linux-x64-2.291.1.tar.gz
The second section describes how to configure and run the self-hosted runner. Again don’t use these instructions, use the ones provided on the settings page, since the --url and the --token are dependent on the repo you want to add the runner to. The ./config.sh asks a few questions, but generally it is very simple and usually the default answers are acceptable. The last command ./run.sh is the runner itself, it connects to GitHub, and needs to be running to be able to accept workflows/jobs. See note about security.
# Create the runner and start the configuration experience
$ ./config.sh --url https://github.com/<user>/<repo> --token <token>
# Last step, run it!
$ ./run.sh
The third section describes how to enable the runner in the Yaml file which is described in the next section.
# Use this YAML in your workflow file for each job
runs-on: self-hosted
This is the procedure to add a self-hosted runner to a repo. To the best of my knowledge, self-hosted runners can be added to GitHub users or GitHub organisations.
Yaml workflow file
To automatically run commands, we need to create a <name>.yml file in the <repo>/.github/workflows/ directory, for example with the following contents:
# .github/workflows/build-and-submit.yml
name: Build and submit
on: push
jobs:
  build:
    name: Build
    runs-on: [self-hosted,login-node]
    steps:
    - uses: actions/checkout@master
    - name: Create build dir
      run: mkdir build
    - name: Run cmake
      working-directory: ./build
      run: CXX=FCCpx cmake ..
    - name: Build
      run: cmake --build build --clean-first
    - name: Submit
      run: pjsub -g $(stat . -c %G) sub.sh
Each <name>.yml file (which can have any name) describes a workflow, with its name: (which can be any string), and the event when it will be executed. The example above will be exectuted on: push.
Each workflow consists of one or more jobs:. Multiple jobs are, by default, executed in parallel. In the example, for simplicity, there is only one job, with the custom identifier build: (this can be a different identifier e.g. job1:). Each job has a name: (similarly to a workflow), and each job needs to specify where it is should run using the runs-on: value. Without self-hosted runners, we can specify here a docker image (something like ubuntu-20.04), but in our case [self-hosted,login-node] specifies that the job should be executed on a self-hosted runner. The login-node is custom label which can be added to the runner on GitHub.
The main part of a job is the steps: field, which describes a list of steps which are executed sequentially. The job in the example has 5 steps. The first step is an “external” step (like importing a library), which checks out the master branch of the repository. The second, third and fourth steps create a build directory, call cmake in that directory (using the working-directory:), and builds the app using cmake --build. Finally, the last step, calls the command of the supercomputer scheduler to submit the sub.sh script.
Observing the actions
The top bar of a GitHub repository has an “Actions” page.

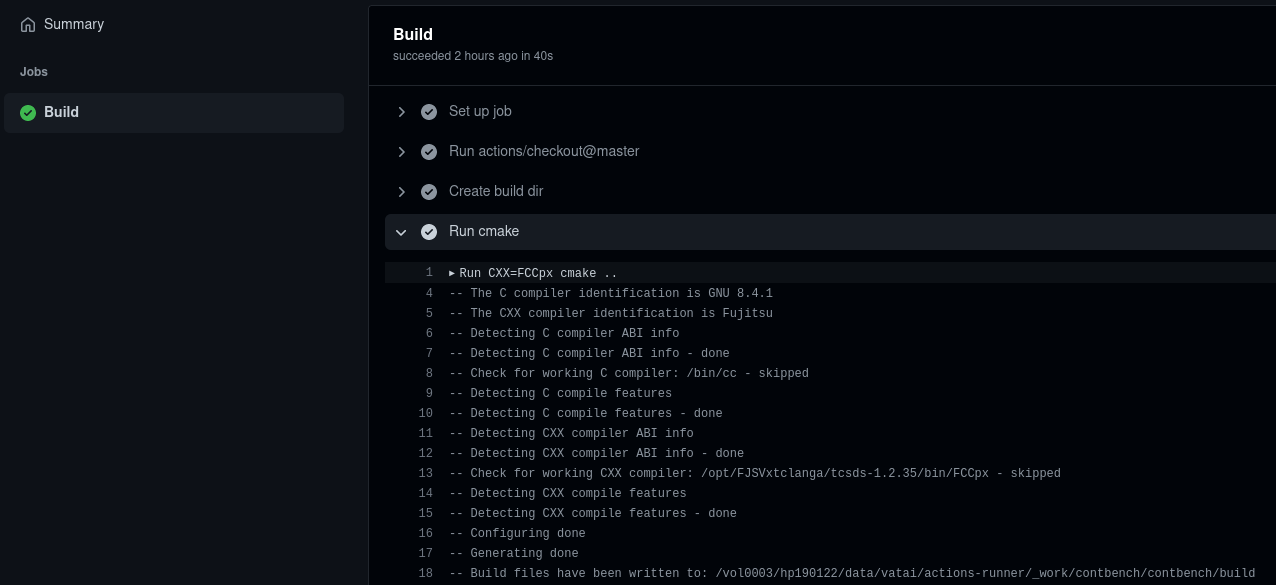
This page lists the workflows which were executed for the given repository. Clicking on a workflow, brings up a list of jobs defined for that workflow, and clicking on a job brings up the steps of that job. Clicking on a step expands it and displays the

Security
This is obviously a security issue. The runner script ./run.sh should be running all the time, connected to GitHub.com, waiting for jobs. As stated on GitHub, this should be enabled only for private repositories.
Future work
Next, I’d like to figure out how to write a workflow or a job which monitors when the submitted script finishes.
Enjoy Reading This Article?
Here are some more articles you might like to read next: